In the world of woodworking, few tools are as versatile and indispensable as the miter saw. With its ability to swiftly and precisely cut through wood at various angles, it has become a staple in both amateur and professional workshops alike. However, to truly unlock its full potential, mastering advanced techniques is crucial. In this article, we delve into the realm of advanced Miter Saw Tips and Tricks, exploring everything from intricate bevel cuts to the nuances of crown molding installation. Whether you’re a seasoned craftsman or just beginning your woodworking journey, this guide will equip you with the knowledge and skills needed to tackle even the most complex angles with confidence.
Understanding Bevel Cuts When Implementing Miter Saw Tips and Tricks
Mastering the art of bevel cuts opens up a world of possibilities in woodworking, allowing craftsmen to create dynamic angles and intricate designs with precision. In this section, we’ll delve into the fundamentals of bevel cuts, covering their definition, adjustment on a miter saw, essential safety precautions, and common applications in woodworking projects.
Definition and purpose of bevel cuts
Bevel cuts involve tilting the blade of a miter saw to cut through wood at an angle other than 90 degrees, resulting in edges that are not perpendicular to the surface. This technique is commonly used to create chamfers, miters, and compound angles, adding depth and dimension to projects. Whether it’s crafting elegant picture frames or constructing complex furniture joints, mastering bevel cuts is essential for achieving professional-quality results.
How to adjust the bevel angle on a miter saw
Adjusting the bevel angle on a miter saw is a straightforward process that varies slightly depending on the model. Typically, it involves loosening the bevel lock mechanism, tilting the saw blade to the desired angle using the bevel scale or protractor, and securely tightening the lock to maintain the chosen angle. Some advanced Miter Saw Tips and Tricks also feature positive stops for commonly used angles, streamlining the adjustment process and ensuring accuracy.
Safety precautions for making bevel cuts
While bevel cuts can enhance the visual appeal of woodworking projects, they also introduce additional hazards due to the angled nature of the cuts. To minimize the risk of accidents, it’s crucial to adhere to strict safety protocols. This includes wearing appropriate personal protective equipment such as safety glasses and hearing protection, maintaining a clear workspace free of clutter, and always keeping hands away from the blade during operation. Additionally, double-checking the angle settings and conducting test cuts on scrap material can help ensure precision and prevent costly mistakes.
Common applications for bevel cuts in woodworking projects
Bevel cuts find myriad applications in woodworking, from decorative flourishes to structural components. They are frequently used in creating intricate joinery such as dovetail and lap joints, as well as in crafting custom moldings, trim pieces, and architectural details. Additionally, bevel cuts are indispensable for tasks like creating angled edges on tabletops, fitting pieces together at non-standard angles, and constructing complex geometric shapes. By incorporating bevel cuts into your repertoire, you’ll have the flexibility to tackle a wide range of design challenges and elevate your woodworking projects to new heights of craftsmanship.
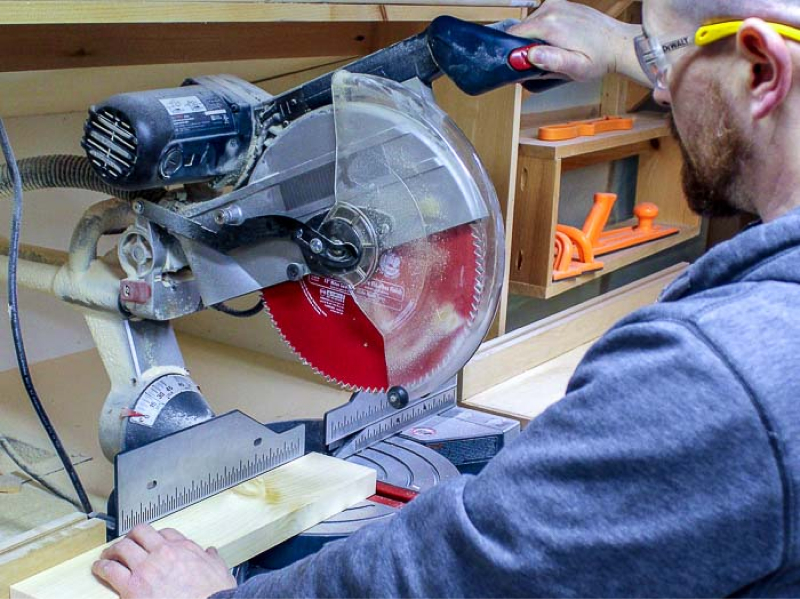
Miter Saw Tips and Tricks for Bevel Cutting
While mastering the technique of bevel cuts is essential, employing certain tips and tricks can greatly enhance your efficiency and accuracy in woodworking projects. In this section, we’ll explore valuable strategies for ensuring precise measurements, utilizing auxiliary fences for stability, tackling bevel cuts on small or narrow pieces, and troubleshooting common issues that may arise during the process.
Ensuring Accuracy with Precise Measurements
Achieving accurate measurements is paramount when executing bevel cuts, as even minor discrepancies can lead to misaligned joints or uneven edges. To ensure precision, use high-quality measuring tools such as a reliable tape measure or combination square to meticulously mark the cutting lines on your workpiece. Additionally, consider employing marking techniques like knife scoring or pencil scribing for crisp, visible lines that are less prone to error. Before making any cuts, double-check your measurements and take the time to fine-tune the angle settings on your miter saw for optimal results.
Using Auxiliary Fences for Stability and Support
When cutting bevels on longer or wider workpieces, maintaining stability and support throughout the cutting process is crucial for achieving clean, uniform cuts. One effective strategy is to install auxiliary fences on either side of the miter saw blade to provide added stability and prevent the workpiece from shifting during cutting. These fences can be constructed from sturdy materials such as plywood or MDF and clamped securely in place to create a stable cutting surface. Additionally, attaching sacrificial backing boards behind the workpiece can help minimize tear-out and prevent splintering, resulting in smoother, cleaner cuts.
Miter Saw Tips and Tricks for Cutting Bevels on Small or Narrow Pieces
Tackling bevel cuts on small or narrow pieces presents unique challenges due to their size and shape, requiring careful attention to detail and precision. To ensure safety and accuracy when working with smaller pieces, consider using specialized accessories such as a miter saw stand with adjustable supports or a small parts jig to securely hold the workpiece in place during cutting. Alternatively, clamping the workpiece to a larger sacrificial board can provide added stability and prevent it from shifting or tipping during cutting. Additionally, adjusting the cutting speed and feed rate of the miter saw to match the size and thickness of the workpiece can help prevent overheating and minimize the risk of kickback or blade deflection.
Troubleshooting Common Issues with Bevel Cuts
Despite meticulous planning and preparation, bevel cuts may occasionally present challenges or unforeseen issues that require troubleshooting. One common issue is tear-out or splintering along the edges of the cut, which can result from dull blades, improper feed rates, or inconsistent grain direction. To minimize tear-out, ensure that your miter saw blade is sharp and properly aligned, and adjust the cutting speed and feed rate to match the characteristics of the wood. Additionally, using masking tape or painter’s tape along the cutting line can help prevent splintering and produce cleaner, smoother cuts. If you encounter issues with angle accuracy or blade alignment, carefully inspect the miter saw’s components for any signs of damage or wear, and make necessary adjustments or repairs as needed. By employing these troubleshooting techniques, you can overcome common challenges and achieve flawless bevel cuts with confidence and precision.
Mastering Crown Molding
Crown molding adds elegance and sophistication to interior spaces, but its installation can be daunting for even the most seasoned woodworkers. In this section, we’ll delve into the intricacies of mastering crown molding, covering everything from understanding its unique challenges to mastering Miter Saw Tips and Tricks techniques for precise cutting and seamless installation.
Overview of crown molding and its challenges
Crown molding is a decorative trim installed at the junction between walls and ceilings, serving to enhance architectural details and add visual interest to a room. However, cutting and installing crown molding can be challenging due to its complex angles and the need for precise measurements and cuts. Unlike standard trim pieces, crown molding must be installed at an angle to ensure proper fit and alignment, requiring careful planning and execution to achieve professional-quality results. Common challenges include accurately determining the spring angle, calculating compound miter cuts, and ensuring tight-fitting joints at inside and outside corners.
Techniques for cutting crown molding on a miter saw
Mastering the art of cutting crown molding on a miter saw is essential for achieving clean, precise cuts and seamless joints. To begin, accurately determine the spring angle of the crown molding using a protractor or specialized tool, as this will dictate the angle at which the molding must be cut. Next, set the miter and bevel angles on the miter saw to match the desired angle of the corner joint, taking into account the spring angle of the molding. For inside corners, use a miter saw with dual bevel capability to make compound cuts, ensuring that the molding sits flush against the wall and ceiling. For outside corners, reverse the angles on the miter saw to create complementary cuts that result in a tight-fitting joint. Additionally, using a crown molding jig or holding the molding securely in place with auxiliary supports can help prevent movement and ensure accurate cuts.
Proper positioning and support for cutting crown molding
Proper positioning and support are critical when cutting crown molding to ensure stability and accuracy throughout the cutting process. Begin by placing the molding flat on the miter saw table with the bottom edge against the fence, ensuring that it is oriented correctly according to the spring angle. To prevent the molding from slipping or tilting during cutting, use auxiliary supports such as crown molding stops or adjustable stands to hold it securely in place. Additionally, consider using a crown molding jig or custom-built support blocks to maintain consistent positioning and support along the length of the molding, minimizing the risk of misalignment or errors.
Tips for achieving tight-fitting joints when installing crown molding
Achieving tight-fitting joints is essential for a professional-looking finish when installing crown molding. To ensure seamless joints at inside corners, cut the molding with precise angles and use a coping saw or miter saw to remove material from the backside of one piece, allowing it to fit snugly against the profile of the adjoining piece. For outside corners, ensure that the angles of the cuts are complementary and use a quality adhesive or fasteners to secure the joints firmly in place. Additionally, filling any gaps or imperfections with wood filler or caulk and carefully sanding the joints smooth can help achieve a seamless transition between molding pieces. By following these tips and techniques, you can master the art of cutting and installing crown molding with confidence and precision, transforming ordinary spaces into stunning showcases of craftsmanship.
Advanced Angles and Complex Cuts
In the realm of woodworking, mastery of advanced angles and complex cuts opens up a world of creative possibilities, allowing craftsmen to push the boundaries of traditional design and craftsmanship. In this section, we’ll explore the intricacies of working with complex angles, covering everything from calculating and setting precise measurements on a miter saw to utilizing specialized jigs and fixtures for cutting irregular shapes. Additionally, we’ll delve into the creative applications of complex cuts in woodworking projects, demonstrating how they can elevate the aesthetic appeal and functionality of your creations.
Introduction to Complex Angles and Their Applications
Complex angles, defined as angles that deviate from standard 90-degree cuts, play a crucial role in achieving intricate designs and structural integrity in woodworking projects. Whether it’s creating geometric patterns, compound joinery, or sculptural elements, understanding how to work with complex angles opens up a wealth of creative possibilities. From octagonal tabletops to faceted drawer fronts, the application of complex angles adds depth, visual interest, and sophistication to furniture and decorative pieces.
Strategies for Calculating and Setting Complex Angles on a Miter Saw
Accurately calculating and setting complex angles on a miter saw requires careful planning and precision. Begin by visualizing the desired angle and identifying the primary and secondary bevel or miter angles needed to achieve it. Utilize mathematical formulas or specialized angle-finding tools to calculate the exact measurements, taking into account factors such as the number of sides in the shape and the desired slope of the cuts. Once the angles have been determined, set the miter and bevel angles on the miter saw accordingly, double-checking the settings to ensure accuracy before making any cuts. For particularly intricate designs or compound angles, consider creating test pieces or mock-ups to fine-tune the measurements and verify the fit before proceeding with the final cuts.
Using Jigs and Fixtures for Cutting Irregular Shapes and Angles
When working with irregular shapes or angles, utilizing specialized jigs and fixtures can streamline the cutting process and ensure consistent results. Custom-built sleds, templates, and angle guides can provide stability and support for cutting complex shapes and angles, allowing for precise control and repeatability. For curved or non-linear cuts, consider using a bandsaw or scroll saw equipped with a tilting table or adjustable fence to achieve smooth, accurate cuts. Additionally, incorporating digital tools such as CAD software or CNC machines can further enhance precision and efficiency when working with complex shapes and angles, offering greater flexibility and customization options.
Creative Applications of Complex Cuts in Woodworking Projects
The creative potential of complex cuts extends far beyond mere aesthetics, offering functional and structural benefits that enhance the overall design and performance of woodworking projects. From intricate joinery techniques like compound miters and dovetails to sculptural elements such as twisted legs and faceted surfaces, complex cuts can elevate the craftsmanship and artistic expression of furniture, cabinetry, and decorative pieces. By incorporating innovative design elements and pushing the boundaries of traditional woodworking techniques, craftsmen can create one-of-a-kind pieces that captivate the eye and inspire admiration for generations to come.
Safety Considerations when thinking about Miter Saw Tips and Tricks
Woodworking, while rewarding and fulfilling, comes with inherent risks that must be carefully managed to ensure a safe and productive workshop environment. When it comes to using a miter saw, prioritizing safety is paramount to prevent accidents and injuries. In this section, we’ll underscore the importance of following safety guidelines, discuss essential protective gear and equipment, address precautions for handling small or irregularly shaped workpieces, and highlight the significance of proper maintenance and upkeep of miter saws for optimal safety.
Importance of Following Safety Guidelines When Using a Miter Saw
Using a miter saw involves working with sharp blades and powerful motors, making it essential to prioritize safety at all times. Familiarize yourself with the manufacturer’s instructions and guidelines for safe operation, including proper setup, adjustment, and use of the miter saw. Always maintain a clear workspace free of clutter, distractions, and potential hazards, and ensure that the miter saw is securely mounted to a stable surface. When making cuts, use both hands to control the workpiece and keep fingers and hands away from the blade at all times. Additionally, never operate the miter saw while under the influence of drugs or alcohol, and always exercise caution and common sense to prevent accidents and injuries.
Protective Gear and Equipment for Safe Operation
Wearing appropriate protective gear and equipment is essential for minimizing the risk of injury when using a miter saw. Always wear safety glasses or goggles to protect your eyes from flying debris and dust, as well as hearing protection to reduce the risk of hearing damage from the loud noise generated by the saw. Additionally, consider wearing a dust mask or respirator to prevent inhalation of harmful particles and fumes, particularly when working with treated or composite wood materials. When making cuts, avoid wearing loose clothing or jewelry that could become entangled in the saw blade, and always tie back long hair to prevent accidents. By prioritizing personal protective equipment, you can minimize the risk of injury and create a safer working environment for yourself and others.
Precautions for Handling Small or Irregularly Shaped Workpieces
Handling small or irregularly shaped workpieces presents unique challenges and requires extra precautions to ensure safe operation of the miter saw. When cutting small pieces, use a push stick or other suitable tool to maintain a safe distance between your hands and the blade, minimizing the risk of accidental contact. For irregularly shaped workpieces, such as round or curved stock, use specialized jigs or fixtures to secure the workpiece and prevent it from rolling or shifting during cutting. Additionally, always exercise caution and precision when positioning the workpiece on the miter saw table, ensuring that it is stable and properly supported to prevent kickback or blade deflection. By taking the time to properly handle and secure small or irregularly shaped workpieces, you can reduce the risk of accidents and ensure safe and accurate cuts.
Ensuring Proper Maintenance and Upkeep of Miter Saws for Optimal Safety
Regular maintenance and upkeep of miter saws are essential for ensuring optimal performance and safety in the workshop. Routinely inspect the saw blade, motor, and other components for signs of wear, damage, or misalignment, and make any necessary repairs or adjustments promptly. Keep the saw blade clean and sharp to ensure smooth, accurate cuts and minimize the risk of kickback or blade deflection. Additionally, regularly check and adjust the miter and bevel angles to ensure they are accurate and consistent, and lubricate moving parts as needed to prevent friction and prolong the lifespan of the saw. Finally, always store the miter saw in a dry, secure location when not in use, and follow proper storage and transportation procedures to prevent damage and ensure safe handling. By prioritizing proper maintenance and upkeep of miter saws, you can enhance safety and prolong the lifespan of your equipment, creating a safer and more efficient woodworking environment.
Concluding our thoughts on Miter Saw Tips and Tricks
In this comprehensive guide, we’ve explored a myriad of Miter Saw Tips and Tricks, techniques and strategies to help woodworkers master the art of miter saw usage. From understanding bevel cuts and mastering crown molding to tackling complex angles and prioritizing safety, each section has provided valuable insights and practical advice for achieving precision and efficiency in woodworking projects. As you embark on your woodworking journey, we encourage you to practice and experiment with advanced techniques, pushing the boundaries of your creativity and craftsmanship. Remember, mastery takes time and dedication, so don’t be afraid to make mistakes and learn from them along the way. For those seeking further learning and exploration in woodworking, a wealth of resources awaits, including online tutorials, woodworking forums, and local workshops or classes. Ultimately, mastering miter saw skills is not just about creating beautiful and functional pieces—it’s about unlocking your potential as a craftsman and experiencing the satisfaction of turning your vision into reality. So, embrace the challenges, hone your skills, and let your passion for woodworking guide you towards success.

